Drawing both knees to the chest for a few breaths · Lying flat in Corpse to let the spine settle to neutral
Time your hold
Three soft ticks and a bell when you're done, so you can close your eyes and stop watching the clock.
How to do it
Lie on your back with your knees bent and feet flat, hip-width apart and close to your hips.
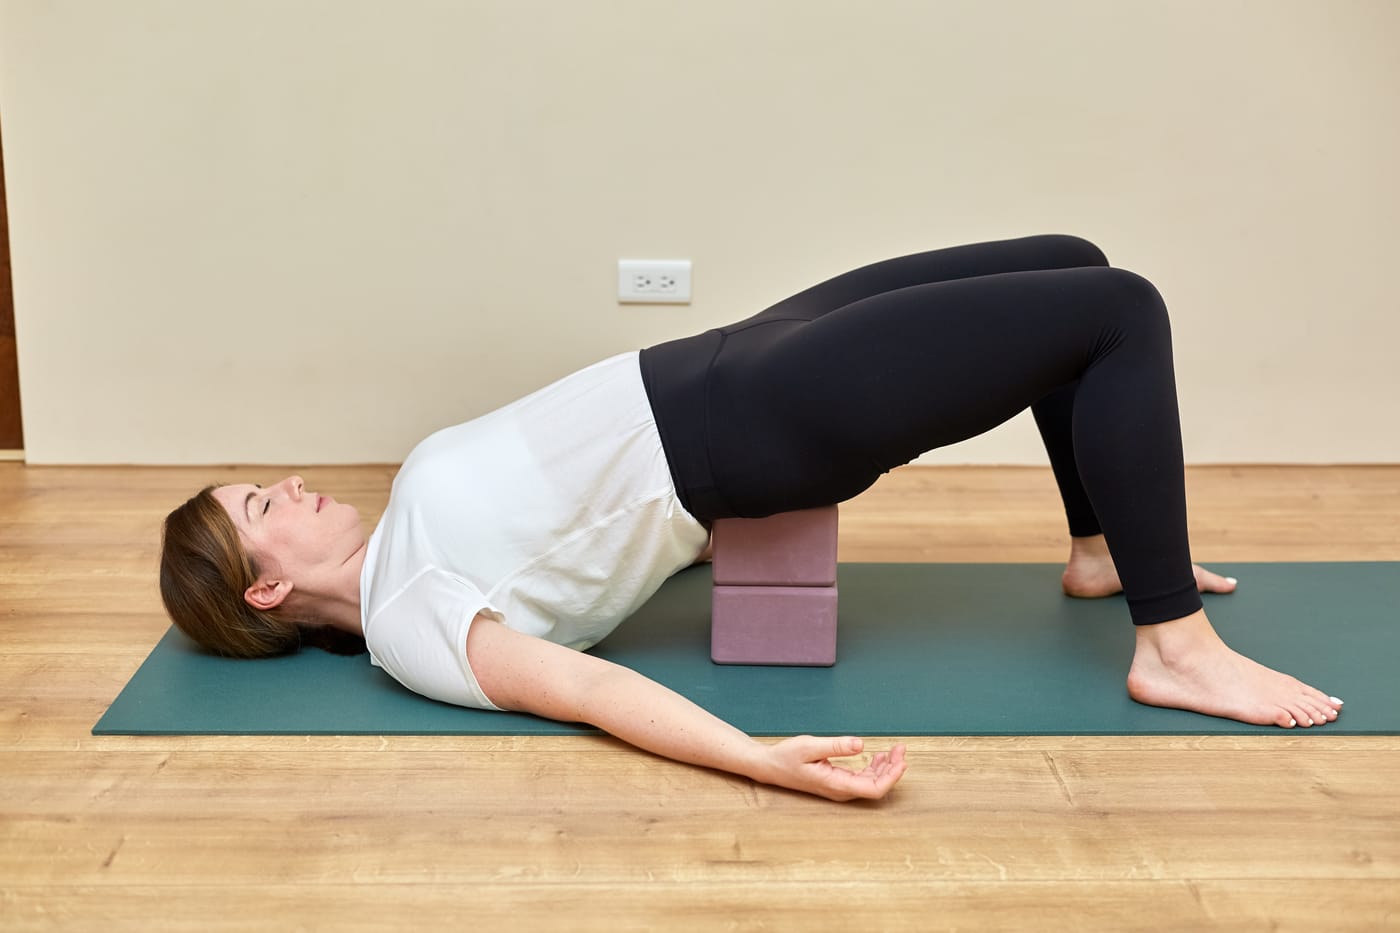
Press into the feet to lift the hips, and slide a block or a bolster under your sacrum — the flat bony plate at the base of the spine, not the lower back.
Lower your weight onto the prop and let it carry you. The sacrum should feel supported, never pinched.
Choose your height: a block on its lowest setting or a bolster for a gentle lift, a taller block edge for more. Every pose has a gentler option and a deeper one.
Let the arms rest by your sides and soften everything you do not need — the belly, the buttocks, the jaw.
Find a comfortable edge, never a strain in the lower back, then be still and breathe. Let the shape do the work.
Why practice it
A passive, propped backbend that opens the front of the hips and gently arches the lower back — the prop holds you so you can let go.
A mild inversion: with the hips lifted above the heart, it invites a quiet, settling shift and can feel restful and restorative.
Stimulates the sacral-lumbar area and works the Kidney and Urinary Bladder lines along the spine, with the Stomach and Spleen lines across the front of the hips.
A softer alternative to the stronger backbends — a lovely way to open the low back and hips without any effort to hold yourself there.
Before you go
Want the follow-along version?
No spam, ever. Unsubscribe any time. I'll only send Yin.
Check your inbox 🌙 your two-hour retreat is on its way.
Take care
Support the sacrum, not the lower back — placed too high the prop can pinch the lumbar spine, so slide it down until it feels comfortable.
As a mild inversion, come out slowly and pause before sitting up if you tend to feel lightheaded.
Approach cautiously with a lower-back or neck injury, and start with the lowest prop height.
If pregnant, avoid lying flat on the back for long holds; check with your care provider before choosing this shape.
Coming in & out
Into the pose
Lift the hips and slide the prop under the sacrum, then lower onto it.
Out of the pose
Come out slowly: press into the feet, lift the hips just enough to slide the prop away, and lower the back down to the floor to rest.
Common questions
What does Supported Bridge do?
It's a passive, propped backbend: with a block or bolster under the sacrum, the front of the hips opens and the lower back gently arches while the prop holds you up. Because the hips rest above the heart, it's also a mild inversion that many people find quietly settling.
Where should the block go in Supported Bridge?
Under the sacrum — the flat bony plate at the base of the spine — not under the lower back. Placed too high, the prop can pinch the lumbar spine, so slide it down until the sacrum feels evenly supported and comfortable. Start on the lowest block height and build up.
How long do you hold Supported Bridge in Yin Yoga?
Most people rest here for 3–5 minutes. Because it's a passive shape, you can stay comfortably as long as the sacrum feels supported and the lower back stays easy. Come out a little sooner if you ever need to.
What's the difference between Supported Bridge and Bridge Pose?
Regular Bridge is an active backbend — you press into the feet and hold the hips up with your muscles. Supported Bridge is the restful version: a prop under the sacrum carries the lift so you can release completely, making it far gentler on the back and easy to hold for minutes.
Supported Bridge is one shape among many. When you'd like to put a whole sequence together into one long, slow practice, pop your email in and I'll send you my free two-hour Yin, restorative and Yoga Nidra retreat. Yours to keep.
No spam, ever. Unsubscribe any time. I'll only send Yin.
Check your inbox 🌙 your two-hour retreat is on its way.
Add this to your Home Screen: tap Share, then Add to Home Screen.